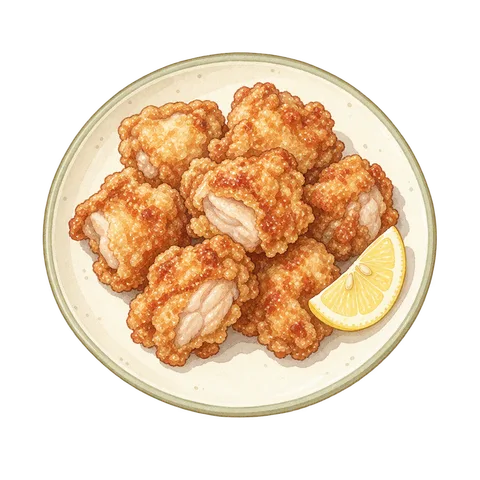
Meat DishesOriginal
Salted Ginger Fried Chicken
Chicken thighs (boneless, skin-on)SaltGinger (grated)
COSORI · CAF-L501-KJP
View Ingredients and InstructionsCOSORI / CAF-L501-KJP
Spread garlic butter on the bread and lightly toast the surface.
The official sources referenced are listed in the "References" section at the bottom of the page.
For information on the use of AI and the scope of verifiable content, please refer to our general posting guidelines. Please read the preconditions and instructions for each step before cooking, and verify the final result using the method described in the text.
After about 2 minutes, pull out the basket and check the surface. If the garlic starts to burn, stop the cooking process early. Check the condition after cooking is complete. Check the thickest part to verify that the center meets the completion criteria listed in the “Finished Product” section. Transfer items that meet the completion criteria to a clean plate. If it does not meet the criteria, and provided there is no burning or other abnormalities, remove the testing tool, return the food to the basket, and resume cooking for the remaining time originally set. If it is still not done after the set time has elapsed, stop heating and proceed to the final check step. If it has started to burn, do not resume cooking. If you notice smoke, an unusual odor, or an error indicator, stop the appliance immediately, discontinue use, and follow the instructions in the user manual.
Instructions for preheating, mid-cooking checks, and how to check for doneness are included in the preparation instructions.
Make garlic butter and spread it on the bread. After preparing the ingredients, preheat the air fryer.
Mix garlic, salt, and dried parsley into softened unsalted butter. Spread a thin, even layer on one side of the bread, making sure it doesn’t extend too far beyond the edges.
Discuss these instructionsProperly attach the Crisp plate to the basket, then place it back in without adding any food. Select “Preheat,” set the temperature to 160℃, and start the cycle. Wait for the 3-minute preheating cycle—which is set automatically—to complete. Prepare a heat-resistant surface where you can place the hot basket.
Discuss these instructionsOnce preheating is complete, remove the basket and arrange the ingredients on a plate, leaving space between them so they aren’t stacked. Return the basket to the unit, manually set the temperature to 160℃ and the time to 4 minutes, then start the cycle. Do not use the preset’s default time. After about 2 minutes, pull out the basket and check the surface. If the garlic starts to burn, stop the cycle early. For mid-process checks, follow the “Completed,” “Not Completed,” or “Abnormal” determinations in the “Heating Stage” section, and use the controls in the “Conditions” section to stop or resume the process.
Discuss these instructionsStop cooking once the surface is lightly dried and has reached your desired level of browning. Be careful of the hot butter when removing the food, then cut it into bite-sized pieces.
Discuss these instructionsIf the dish does not meet the completion criteria, stop heating and proceed to the final check step. If the surface begins to burn, do not continue heating as is; stop adding more food.
Discuss these instructionsIf the garlic begins to burn, stop heating and do not eat it. Even if the surface has not reached the desired slightly dry finish, do not repeat the heating process based on guesswork unless you can confirm the appropriate settings for 60g of sliced bread (20mm thick, starting at room temperature) coated with garlic butter in the official instructions or product label.
Discuss these instructionsStop cooking once the surface is lightly dried and has reached your desired level of browning. Be careful of the hot butter when removing the food, then cut it into bite-sized pieces.
Reference Information on Heating and Food Poisoning Prevention ↗
Things You Can Verify Without Consulting Anyone →
Stop it early. Next time, mix the garlic well and spread it thinly, and check on it sooner during cooking.
Record any differences from your preferred texture. Extending the cooking time until the surface burns will not resolve the issue.
COSORI PRO LE 4.7L Official Recipe Book, p. 7 ↗
Source checked: 2026-09-08
Notes are saved only on this device. They are not used to determine whether a recipe has been verified.
COSORI · CAF-L501-KJP
View Ingredients and InstructionsCOSORI · CAF-L501-KJP
View Ingredients and InstructionsCOSORI · CAF-L501-KJP
View Ingredients and Instructions
COSORI · CAF-L501-KJP
View Ingredients and Instructions