Vegetables & Side DishesOriginal
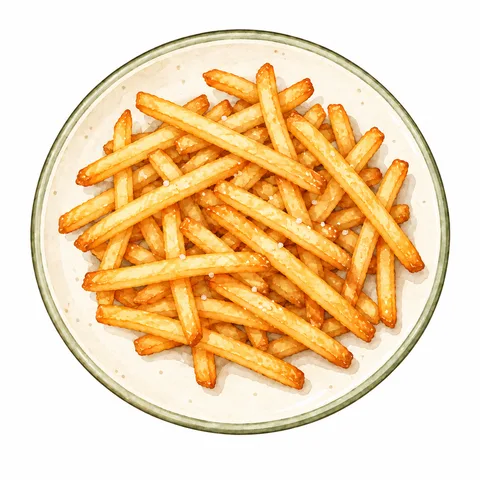
Frozen French Fries
Frozen French Fries (Shoestring)Rice bran oilSalt
Philips · HD9220/27
View Ingredients and InstructionsPhilips / HD9220/27
Thin fries cut into sticks with an 8mm-square cross-section that have been thoroughly patted dry before baking.
The official sources referenced are listed in the "References" section at the bottom of the page.
For information on the use of AI and the scope of verifiable content, please refer to our general posting guidelines. Please read the preconditions and instructions for each step before cooking, and verify the final result using the method described in the text.
After about 10 minutes, reset the timer to 0 to stop it, use tongs to flip the food over, and set the remaining time to about 11 minutes. After the timer ends, check the completion criteria described in the main text. Check the thickest part and verify that the center meets the criteria listed in the “Finished Product” section. Transfer any items that meet the completion criteria to a clean plate. If the food does not meet the criteria, and provided there is no burning or other abnormalities, remove the testing tool, return the food to the air fryer, and resume cooking for the remaining time originally set. If the food is still not done after the set time has elapsed, stop heating and proceed to the final verification step. Do not resume cooking if the food has started to burn. If you notice smoke, an unusual odor, or an error indicator, stop the appliance immediately, discontinue use, and follow the instructions in the user manual.
Instructions for preheating, mid-cooking checks, and how to check for doneness are included in the preparation instructions.
Soak in water for 15 minutes, then pat dry thoroughly.
Cut the peeled potatoes into uniform 8mm-square sticks. Soak them in a bowl of water for 15 minutes, then drain the water and thoroughly pat the surface dry with paper towels. The water is for preparation only and should not be added to the air fryer.
Discuss these instructionsIn a dry bowl, toss the potatoes with rice bran oil. Do not add any excess oil from the bottom of the bowl, and set aside the salt and pepper to add after cooking.
Discuss these instructionsMake sure the unit and basket have cooled to room temperature. Do not preheat the unit, as you should never heat it when it contains no food.
Discuss these instructionsPull out the pan, place the ingredients in a single layer in the basket, slide the pan back in, and set the temperature to 180℃ for approximately 21 minutes as an initial test. After about 10 minutes, reset the timer to 0 and stop it; use tongs to flip the ingredients and switch their positions, then set the timer for the remaining approximately 11 minutes. Do not assume the dish is ready simply because the timer has gone off.
Discuss these instructionsRemove the food when it is tender all the way through and the surface is a light golden brown, then sprinkle with salt and your favorite black pepper. Do not continue cooking until it turns dark brown. If the food has not reached the desired doneness, stop heating and proceed to the final check step.
Discuss these instructionsIf the dish does not meet the completion criteria, review the intermediate checks and final standards listed in the instructions. If you cannot find a method in the official instructions or the product’s cooking guidelines that corresponds to the same ingredients, quantities, thickness, and starting condition, do not repeat the heating process based on guesswork, and do not eat the dish.
Discuss these instructionsRemove them from the oven once they are tender all the way through and the surface is a light golden brown, then sprinkle with salt and black pepper to taste. Do not continue baking until they turn dark brown.
Reference Information on Heating and Food Poisoning Prevention ↗
Things You Can Verify Without Consulting Anyone →
Review drainage and reduce the quantity to fit in a single layer. Do not compensate for overlapping food by extending the cooking time.
Stop heating and check the food for this batch. Next time, cut the pieces uniformly and check them earlier during cooking.
User Manual, p. 13: 8×8mm Homemade Potatoes ↗
Source checked: 2026-10-24
Notes are saved only on this device. They are not used to determine whether a recipe has been verified.