Meat DishesOriginal
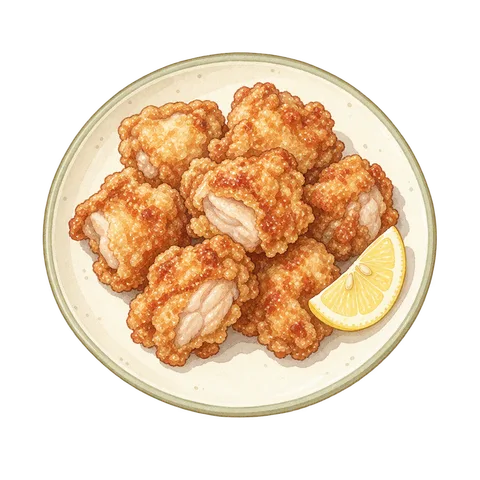
Salted Ginger Fried Chicken
Chicken thighs (boneless, skin-on)SaltGinger (grated)
récolte · RAO-3
View Ingredients and Instructionsrécolte / RAO-3
This is a recipe for tonkatsu made by coating 2 pork loin cutlets with a thin layer of flour, egg, and breadcrumbs.
The official sources referenced are listed in the "References" section at the bottom of the page.
For information on the use of AI and the scope of verifiable content, please refer to our general posting guidelines. Please read the preconditions and instructions for each step before cooking, and verify the final result using the method described in the text.
Flip the pieces after 10 minutes. After 15 minutes, measure whether the core temperature remains at 75℃ or higher for 1 continuous minute. Measure the core temperature and holding time at the thickest part. Transfer any pieces that meet the completion criteria to a clean plate. If a piece does not meet the criteria, but shows no signs of burning or abnormalities, remove the probe and return the food to the appliance, then resume cooking for the remaining time originally set. If it is still not done after the set time has elapsed, stop heating and proceed to the final verification step. If burning begins, do not resume cooking; if smoke, an unusual odor, or an error indicator appears, stop the appliance immediately, discontinue use, and follow the instructions in the user manual.
Instructions for preheating, mid-cooking checks, and how to check for doneness are included in the preparation instructions.
Cut through the sinews and coat the meat.
Do not wash the raw meat; pat the surface dry with paper towels. Wash your hands, the knife, and the cutting board after handling the raw meat, and keep them separate from utensils used for cooked food. Remove the paper towels; do not place them inside the air fryer. Make several shallow cuts with the tip of a knife along the boundary between the lean and fatty parts of the pork loin. Sprinkle 1.8g of salt and 0.2g of black pepper evenly on both sides. Ensure the thickness is 15mm or less.
Discuss these instructionsMix 8g of rice bran oil into 32g of breadcrumbs. Lightly dust the meat with 12g of all-purpose flour, shake off the excess, dip it in 30g of beaten egg, shake off the excess, and gently press the breadcrumbs onto both sides to coat. Discard any leftover flour and egg. Prepare the sauce in a separate small dish for use after heating.
Discuss these instructionsAttach the inner rack to the main basket in the correct orientation. Arrange the ingredients in a single layer without stacking them, leaving space between each item. If they do not fit, do not start cooking; proceed to the “Arrangement Check” section in the conditions. Do not line the basket with paper or foil, and do not block the steam vents. Do not fill beyond the MAX line.
Discuss these instructionsDo not preheat the oven; simply place the basket with the ingredients inside. Set the Air Oven to 175℃ for 15 minutes for the initial check and start the cycle. After 10 minutes, press START/STOP to pause, then carefully pull out the basket, taking care to avoid the hot steam. Flip the food over, switch its front and back positions, reinsert the basket, and resume cooking. For mid-cooking checks, follow the “Completed,” “Not Completed,” or “Abnormal” judgments in the “Heating Stage” column, and use the instructions in the “Conditions” column to stop or resume cooking.
Discuss these instructionsAfter 15 minutes, check for “Pause” or “End” and remove the basket. Insert a thermometer into the thickest part of each of the 2 pieces from the side—measuring the center of the meat, not the breading. Use a food-grade internal thermometer to confirm that the center temperature remains at 75℃ or higher for at least 1 continuous minute. Measure the holding time only after the reading has stabilized; if the temperature drops below 75℃ during this time, do not consider the meat done and proceed to the final verification step. Do not judge doneness based on color, juices, or only 1 temperature reading. Remove the thermometer before reheating, and wash the part that touched the uncooked meat before reuse.
Discuss these instructionsIf the cutlet does not meet the completion criteria, stop heating and proceed to the final inspection step. Slice the cutlet that meets the criteria on a clean cutting board and serve with medium-thick sauce. Do not continue heating simply to achieve the desired color of the breading.
Discuss these instructionsIf the dish does not meet the completion criteria, review the intermediate checks and finishing standards listed here once more. If you cannot find instructions in the reference materials or the product’s cooking instructions that correspond to the same ingredients, quantities, thickness, and starting condition, do not continue heating based on guesswork, and do not eat the food. Avoid refrigerating partially cooked meat and finishing it at a later date.
Discuss these instructionsUse a thermometer to confirm that the core temperature remains at 75℃ or higher for at least 1 minute continuously; once this is achieved, the dish is ready. Slice the cutlet that meets these conditions on a clean cutting board and serve with medium-thick sauce. Do not keep extending the cooking time just to achieve the desired coating color.
Reference Information on Heating and Food Poisoning Prevention ↗
Things You Can Verify Without Consulting Anyone →
Next time, I’ll reevaluate the location and depth of the cuts. If the food curls up during cooking, I’ll pause the process to flatten it again and measure the center of the thickest, most curved part.
Use a thin spatula to support the cutlet from underneath and turn it over. Next time, drain off excess beaten egg to make a thin coating; do not switch to covering the mesh with paper.
Refer to the official “Tender Pork Cutlet” recipe as a reference for related breaded dishes. ↗
Source checked: 2026-09-07
The initial setting is in 5-minute increments. Check the progress based on the elapsed time since heating began; do not use the check time as the unit’s set time.
Notes are saved only on this device. They are not used to determine whether a recipe has been verified.
récolte · RAO-3
View Ingredients and Instructionsrécolte · RAO-3
View Ingredients and Instructionsrécolte · RAO-3
View Ingredients and Instructionsrécolte · RAO-3
View Ingredients and Instructions