Meat DishesOriginal
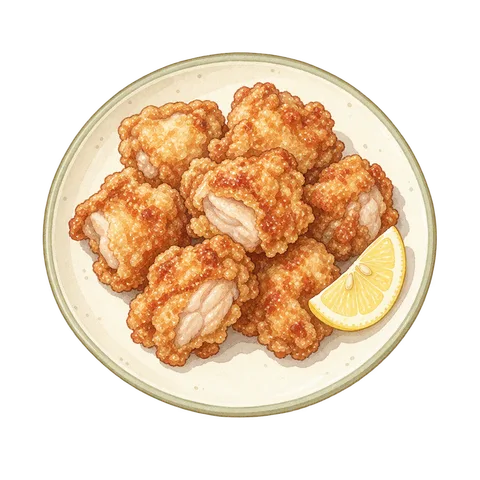
Salted Ginger Fried Chicken
Chicken thighs (boneless, skin-on)SaltGinger (grated)
récolte · RAO-3
View Ingredients and Instructionsrécolte / RAO-3
Trim 2 chicken breast fillets to a thickness of 20mm or less, steam them, and top with lemon after cooking.
The official sources referenced are listed in the "References" section at the bottom of the page.
For information on the use of AI and the scope of verifiable content, please refer to our general posting guidelines. Please read the preconditions and instructions for each step before cooking, and verify the final result using the method described in the text.
After 20 minutes, check whether the core temperature remains at 75℃ or higher for 1 continuous minute. Measure the core temperature and holding time at the thickest part. Transfer items that meet the completion criteria to a clean plate. If the dish does not meet the criteria, but shows no signs of burning or abnormalities, remove the probe and return the dish to the air fryer to resume cooking for the remaining time originally set. If the dish is still not ready when the set time ends, stop heating and proceed to the final verification step. Do not resume cooking if the food has started to burn. If you notice smoke, an unusual odor, or an error message, stop the appliance immediately, discontinue use, and follow the instructions in the user manual.
Instructions for preheating, mid-cooking checks, and how to check for doneness are included in the preparation instructions.
Butterfly the meat, sprinkle it with salt, and let it rest in the refrigerator for 10 minutes.
Do not wash the raw meat; pat the surface dry with paper towels. Wash your hands, the knife, and the cutting board after handling the raw meat, and keep them separate from utensils used for cooked food. Remove the paper towels; do not place them inside the air fryer. Divide the chicken breast into 2 pieces of about 150g each. Make crosswise cuts in the thickest parts to flatten them, ensuring they are all 20mm or thinner. Rub in 2.2g of salt and 0.2g of black pepper, cover, and let sit in the refrigerator for 10 minutes.
Discuss these instructionsIn a clean small bowl, mix 10g of lemon juice, 4g of olive oil, and 0.2g of dried parsley. Place the bowl in an area where it will not come into contact with raw meat, and do not pour the mixture over the meat until you have confirmed it is fully cooked.
Discuss these instructionsCheck the steam catcher and water tray, then fill the water tank with room-temperature water only, up to the MAX line or below, and reinstall it. Do not put seasonings, oil, or water hotter than 40℃ into the tank. Attach the inner mesh to the basket in the correct orientation. Arrange the ingredients in a single layer without stacking them, leaving space between each item. If they do not fit, do not start cooking; proceed to the “Arrangement Check” section in the conditions. Do not line the basket with paper or foil, and do not block the steam vents. Do not fill beyond the MAX line.
Discuss these instructionsDo not preheat; simply place the basket containing the ingredients inside. Set the machine to “Hi Steam,” 180℃, and 20 minutes for the initial test, then start. If the water refill indicator appears, check the operating status; if the machine is running, press START/STOP to pause it. Fill the tank with room-temperature water up to the MAX line or below, replace the lid properly, check the display, and resume operation. For mid-process checks, follow the “Completed,” “Not Completed,” or “Abnormal” indicators in the heating stage section, and use the controls in the conditions section to stop or resume the cycle.
Discuss these instructionsAfter 20 minutes, check for “Pause” or “End” and remove the basket. Measure the thickest part of each of the 2 pieces from the side; do not rely solely on the temperature at the thinner ends. Use a food-grade internal thermometer to confirm that the core temperature remains at 75℃ or higher for at least 1 continuous minute. Wait until the reading stabilizes before timing the holding period; if the temperature drops below 75℃ during this time, do not consider the dish done—proceed to the final verification step. Do not judge doneness based on color, juices, or only 1 temperature reading. Remove the thermometer before reheating, and wash any parts that came into contact with uncooked meat before reusing.
Discuss these instructionsIf the meat does not meet the completion criteria, stop cooking and proceed to the final checking step. Once the meat meets the criteria, slice it on a clean cutting board and drizzle with lemon sauce.
Discuss these instructionsIf the dish does not meet the completion criteria, review the intermediate checks and finishing standards listed here once more. If you cannot find instructions in the reference materials or the product’s cooking instructions that correspond to the same ingredients, quantities, thickness, and starting condition, do not continue heating based on guesswork, and do not eat the food. Avoid refrigerating partially cooked meat and finishing it at a later date.
Discuss these instructionsUse a thermometer to confirm that the core temperature remains at 75℃ or higher for at least 1 minute straight; once this condition is met, the dish is ready. Slice the meat that meets these conditions on a clean cutting board and drizzle with lemon sauce.
Reference Information on Heating and Food Poisoning Prevention ↗
Things You Can Verify Without Consulting Anyone →
If the dish does not meet the completion criteria, stop heating and proceed to the final check step. Next time, measure the thickness of the spread-out meat and ensure there are no rounded, domed areas.
Since this is cooked in the Hi Steam, do not continue cooking in an attempt to achieve a darker color. Once you’ve confirmed the internal temperature and the holding time, remove it from the air fryer and finish it with lemon sauce.
Refer to “Chicken Steak” on page 20 of the user manual as a guideline for similar dishes. ↗
Source checked: 2026-09-07
The initial setting is in 5-minute increments. Check the progress based on the elapsed time since heating began; do not use the check time as the unit’s set time.
Notes are saved only on this device. They are not used to determine whether a recipe has been verified.
récolte · RAO-3
View Ingredients and Instructionsrécolte · RAO-3
View Ingredients and Instructionsrécolte · RAO-3
View Ingredients and Instructionsrécolte · RAO-3
View Ingredients and Instructions